
Simple tips to help you create a Gallery Wall
Pss: Doors to my E-course, The Fresh Nest close this Thursday at midnight! Come join if you’d like help decluttering and styling your home with me!
Last week we put up a gallery wall in our lounge, a project I’d wanted to complete since January. I love a gallery wall, they work in any type of home, can be scaled up or down, and always create a great centerpiece for the room.
I have come up with some hints and tips that take the stress out of gallery wall hanging, see video below for more!
Do this for a truly unique, stand out gallery wall:
Curate a selection of objects that you LOVE rather than things that are 'on trend, then it’ll always make you smile.
Mix old and new: vintage pieces and newer ones.
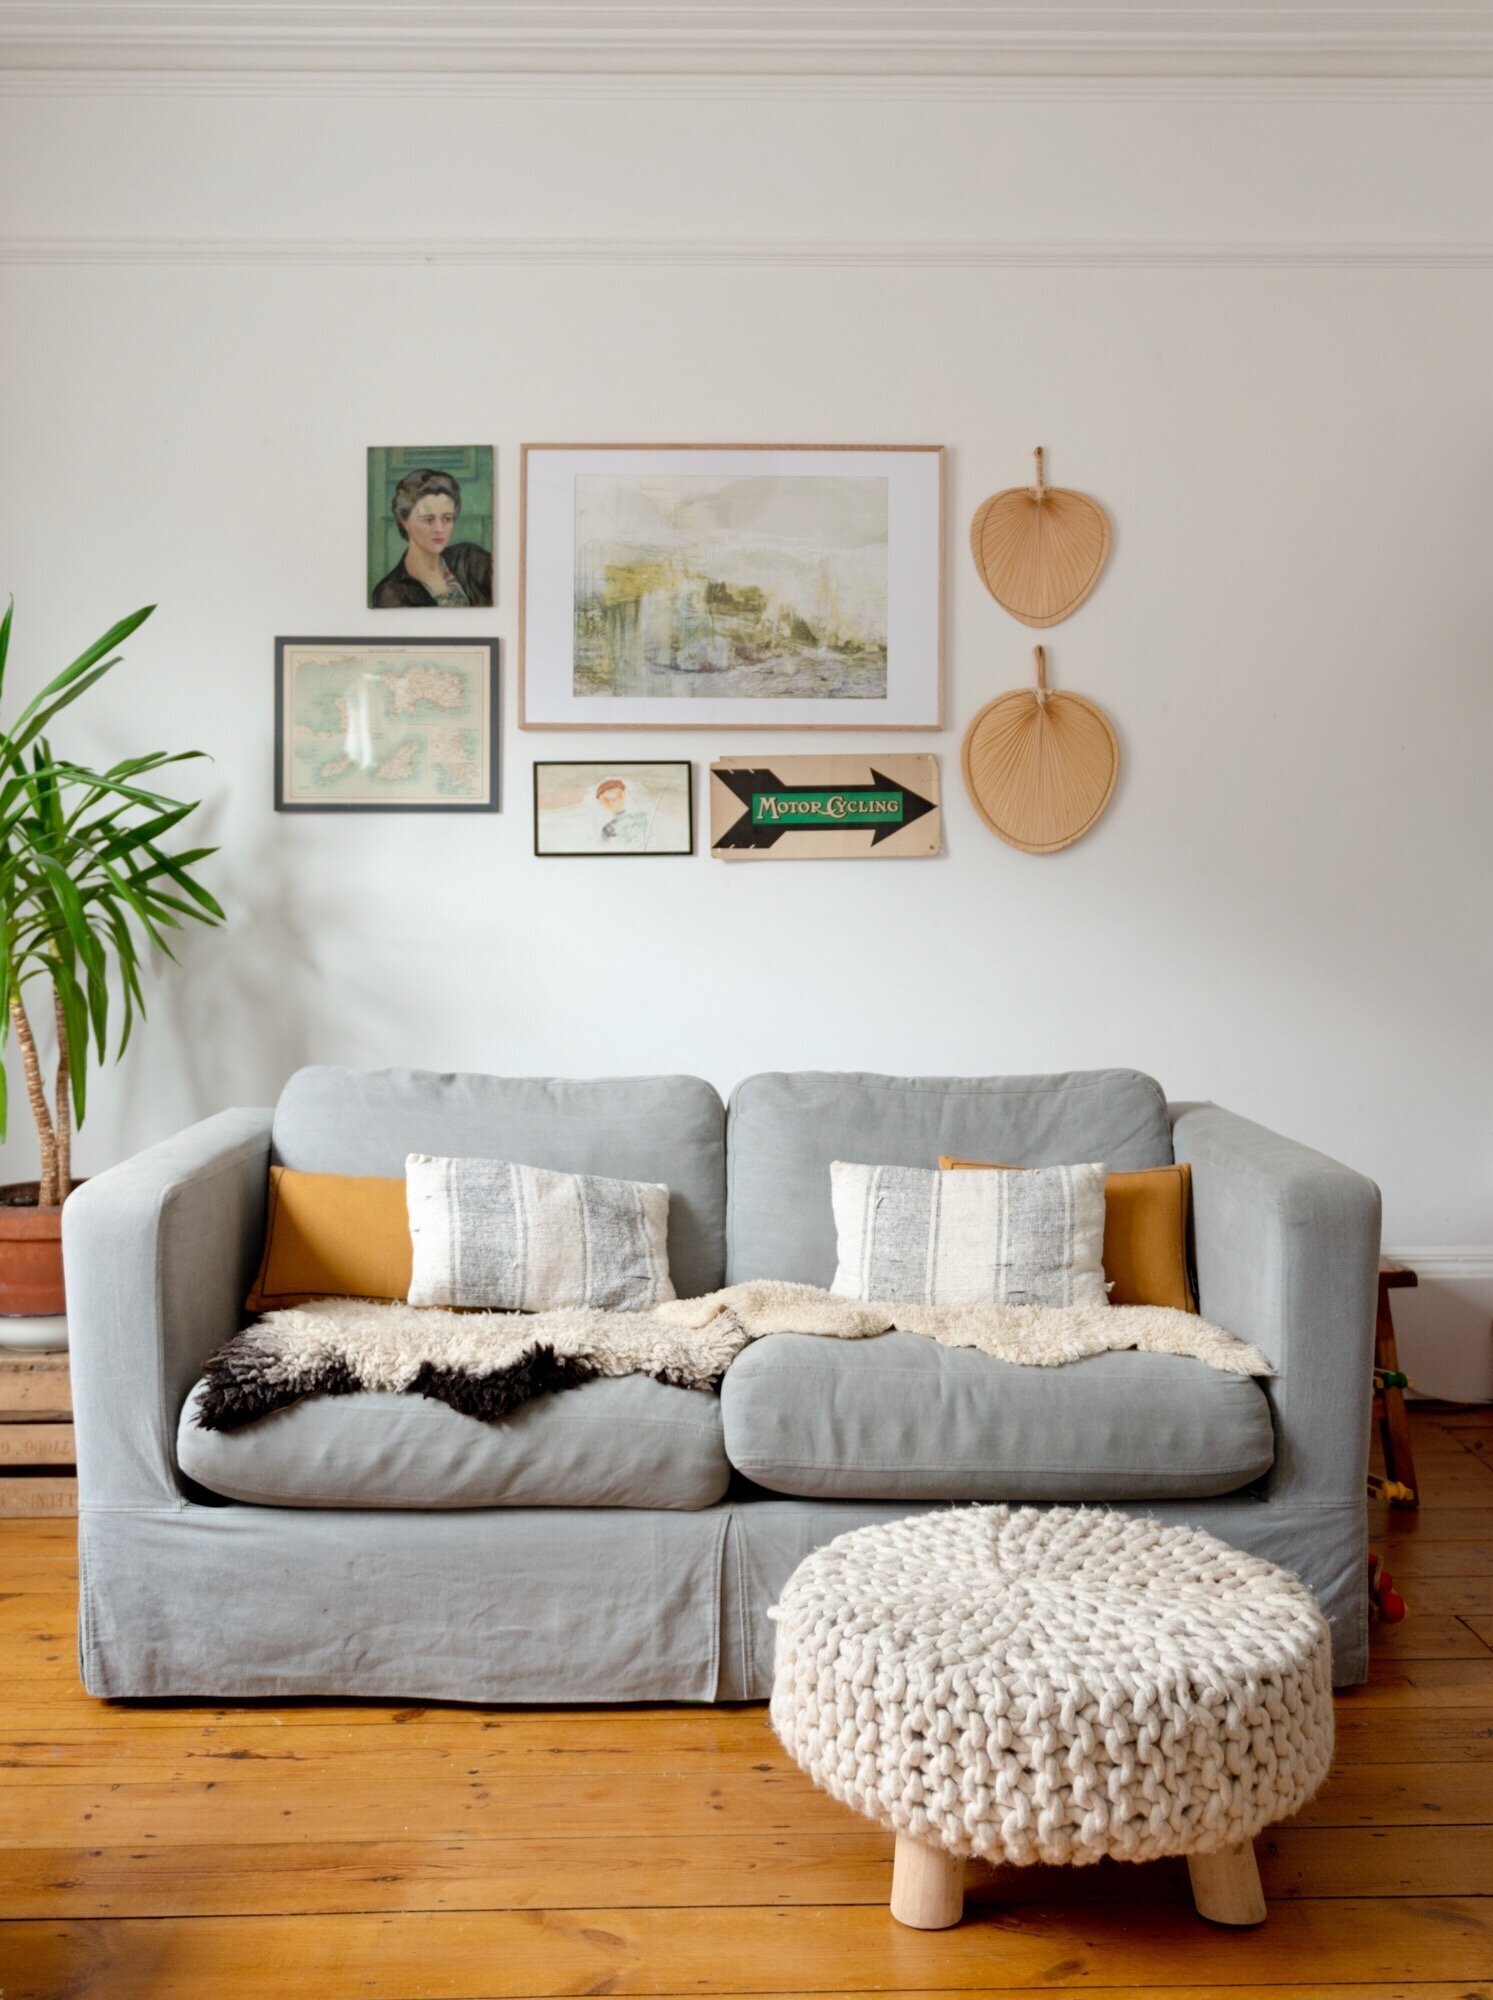
Mix different textures and shapes too- Include something round if all your frames are square, Have a mix of things that are both framed and not framed to mix up the textures. Include something natural like a hanging plant or a beautiful branch, a wreath or a palm leaf, fan like in mine.
Shop your home for all the options, then clear some floor space and lay them out on the floor in different combinations until you’re happy.
Bear in mind the colour palette of your room, and if you feel unsure, try to stick to 1-2 colours. The colour linking my pieces together is green, but if having lots of colour makes you happy, go for it. It’s your wall!
When it comes to hanging, starting with your central hero piece makes hanging much easier. Lay it out on the floor first, then hang your centre piece on the wall first keeping an even gap between the pieces. This method removes the need for exacting measurements.
Generally, don’t stress too much about trying to getting everything laid out and measured pin-point exactly. Starting with the central piece removes the need for this.
If you’d like to mock it up on the wall before you commit to a drill and nails, then cut out paper in the shape of all of your items (simply draw around everything, then cut- this is much quicker than measuring each edge then taping the wall). Because I had laid everything out on the floor, and I started with the central, hero piece, I didn’t feel that I needed to mock it up in paper, but if it makes you feel more comfortable, then do.
If using a drill makes you nervous, look up tutorials on youtube (you can learn everything on youtube!). If you don’t have a drill, screws or wall plugs, could you borrow one from a neighbour? Alternatively, Command Hooks are a great renter friendly option.
You’ll probably be faffing with it for a while afterwards (/forever?!) as you find new pieces and swap things around. Have fun with it!

A tour of my Gallery wall
The hero piece on my gallery wall is Cevennes Autumn 1 by Jessica Zoob, I won it in a competition about 4 years ago and it’s finally found it’s home! Going anticlockwise, the oil painting was a birthday present from my sister in law, she knew i’d been looking for one for ages, and I love her. Underneath that is a framed map of Jersey, where my husband grew up. We found the map in one of our favourite junk markets in London, and had it framed at our old favourite framers, so it has layers of nice memory! Continuing anti-clockwise is a watercolour self portrait that Dave painted when he was a kid, I love it! the glass was cracked at some point so that needs replacing but for now, it’s fine. To the right is the vintage Motorcycling sign. This was another find from our favourite junk market in London. I bought it when I was at uni. Then to the right are two palm leaf fans. I found them on Facebook marketplace recently, and love them.
I hope these tips are helpful for you! Happy gallery wall hanging!